
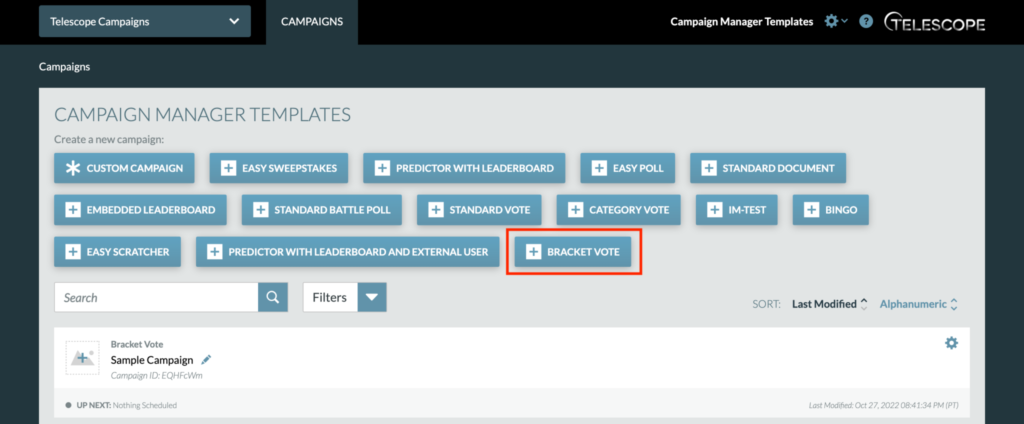
Begin by creating the campaign by clicking “+ Bracket Vote” within your Account.
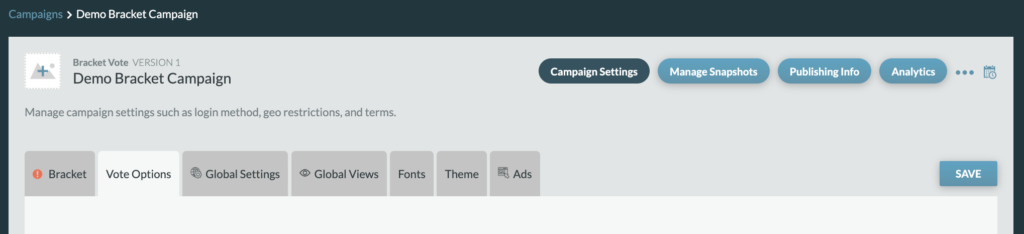
Navigate to the Campaign Settings where you will configure the following:
- Vote Options – Add the vote option information and associated images and/or videos
- Bracket Grid – Once vote options are added, set bracket matchups
- Global Settings – Set Geo limits, add Google Analytics tracking ID, vote settings to enable/disable registration, and metatags
- Global Views – Modify the sitewide background image and/or color, enable Facebook and/or Email login and add login/logout copy, update placeholder images and copy on the Bracket Grid, manage Footer settings, links and styles, and customize Error text
- Fonts – If needed, add any custom fonts to be used for your campaign
- Theme – From here, you’ll set the styling using predetermined color schemes or customize color palettes and element colors, as as select the font families for headers and text
- Ads – where you can enable/disable ad placements that support static sponsor images and a link out. Note, ads are enabled by default so if you will not be using them, be sure to disable all ads from the Ads tab.
Creating Snapshots
Once all the Campaign Settings are configured in your campaign, you are ready to start Creating Snapshots & Managing Rounds
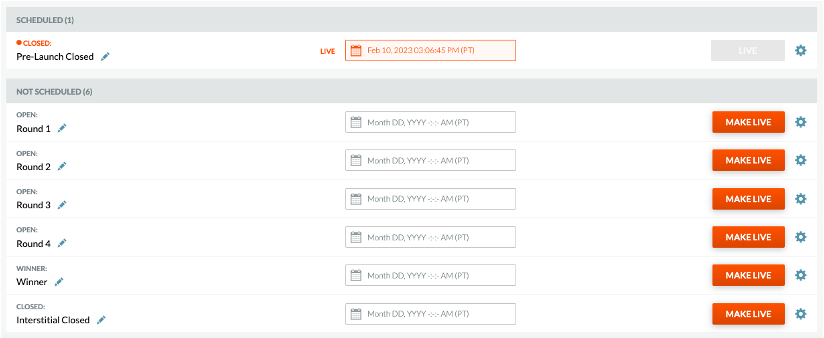
You will need to create the following snapshots:
- Closed Snapshot for the “Pre-Launch” Closed page (includes an optional countdown)
- Open Snapshot for Rounds 1-4, there will be four Open Snapshots in total. We recommend creating the first round’s snapshot and duplicating this snapshot to create the remaining rounds’ snapshots
- Closed Snapshot for Interstitial Closed page(s) that must be pushed between voting rounds
- Winner Snapshot to reveal the Bracket Vote winner
- Closed Snapshot after Winner announcement
Important Notes on Creating Snapshots
- The “Pre-Launch” Closed snapshot must go live before voting for Round 1 can open. This snapshot can include a Header image and Headline and Description copy for the “Pre-Launch” Closed page that tells users when the Bracket Vote will launch.
- You will need another Closed snapshot to go live between each round as an “Interstitial” Closed snapshot. The Headline and Description copy for these snapshots can be used to inform users when the next round will open.
- When creating Open snapshots, we recommend you create your Round 1 Open snapshot first and update assets, settings, and copy. Once you’ve finished and saved the Round 1 snapshot, you can duplicate the snapshot for subsequent rounds, and adjust copy as needed.
- Finally, you will need a Winner snapshot. This snapshot has settings specific to the winner page, including a toggle to display or hide the Hero Section and Bracket Sections of the page, a place to upload a Hero Section image or add a video embed, and adjust the headlines and descriptions.
- If you wish to put up a Closed page after the winner has been announced, you will use a Closed Snapshot and include Headline and Description copy letting users know the vote has ended.
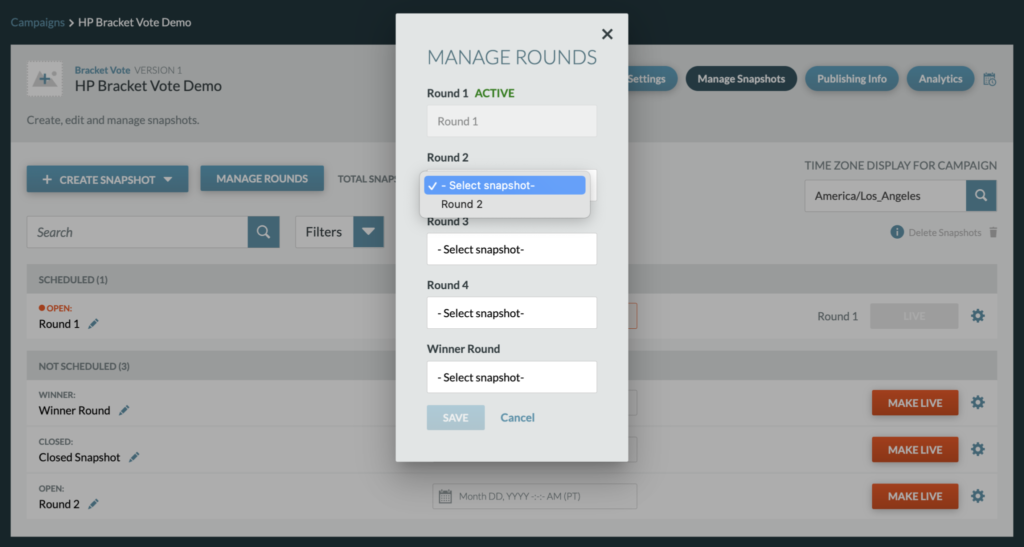
After the snapshots have been created, you’ll click MANAGE ROUNDS which will open a modal including a dropdown per round.
- Assign a snapshot for each round by selecting the snapshot from each dropdown (must be an Open snapshot for rounds 1 – 4 and a Winner snapshot for the final winner/5th round)
- Ensure that Round 1 is active once the Round 1 snapshot has been assigned (this will be by default)
- Once you’ve assigned your snapshots to rounds, click SAVE
Preparing to Launch / Go Live with Your Campaign
- When you’re preparing to launch, push live the Closed snapshot for pre-launch, which will include information about when the Bracket Vote will launch
- Once Campaign Settings, Manage Snapshots, and Manage Rounds have been set up and the Closed pre-launch snapshot live, you can then go live with the first round
- Navigate to the Round 1 snapshot from the snapshot list, confirm that the snapshot is labeled as “Round 1” to the right of the scheduling options
- Click MAKE LIVE next to the Round 1 snapshot
- Once the a round has been made active and pushed live, the Bracket Tab under Campaign Settings is locked
- The first round’s nominees are no longer active dropdowns, they also are pulling percentages and displaying them next to the contestants

Managing Your Campaign
Transitioning to Next Rounds
- When each Round of voting ends, and a Closed snapshot made live, you will navigate to Manage Snapshots > Manage Rounds to set the next round active by clicking “Make Active” next to the round title in the modal.
- Once the next round is set to Active, click Save. You may then return to the Campaign Settings > Bracket Tab will see the next round as active with active round’s contestant dropdowns enabled.
- You will select the Round 2 (or next Round’s) match-ups based off the previous round winners (ideally using the percentages)
- You will then click SAVE
- If all available dropdowns are not complete, you will see a warning message on the Bracket tab and ultimately will not be able to go live with the next round until the bracket selections are complete
- Once next round bracket is complete and saved, navigate to Manage Snapshots and schedule a time for the snapshot to go live, or push Make Live to go live immediately.
- An Open round will remain open until a Closed snapshot (interstitial) is made live.
- Before the next Open Round can be scheduled or made live, the nominees for each round must be set from the Bracket Tab.
- Continue this same process for all possible voting rounds.
Revealing the Winner
- To reveal the bracket vote winner, the Winner snapshot will need to be set as Active from Manage Rounds, and you will need to select the winner on the Bracket tab. Be sure to update the Winner snapshot with the winner Hero image or video embed.
- When you are ready to reveal the winner, you will schedule or push the Winner snapshot live.