
All features on the Campaign Settings tab should be completed before making any snapshots.
Configurations made on the Campaign Settings tab will affect all snapshots and end user states. Updates made within the Campaign Settings tab during a live campaign will not reflect in the live campaign until a new snapshot is pushed.
Important Note: Changes to the Campaign Settings while the campaign is live is not recommended.
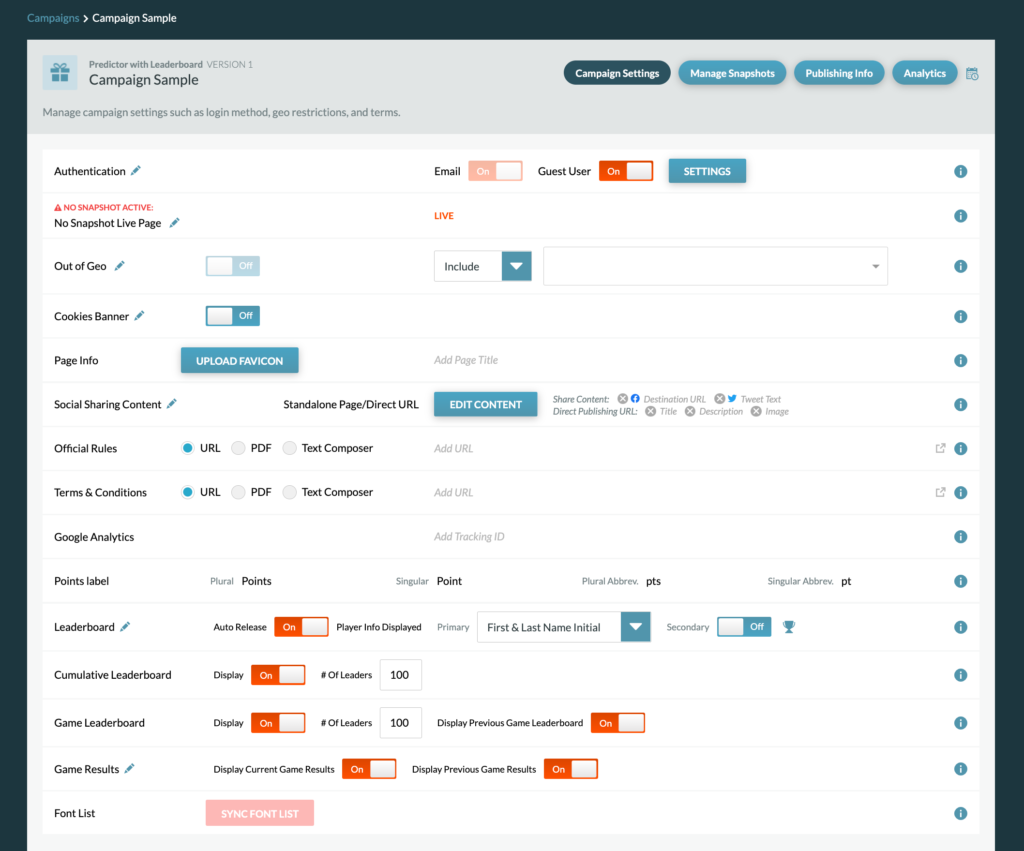
On the Campaign Settings tab, you can:
- Name the Campaign
- Edit the Login Modals and Pages
- Edit the 404 Error Page
- Out of Geo
- Edit Page Info
- Social Sharing Content
- Edit the Official Rules
- Edit the Terms & Conditions
- Add Google Analytics tracking
- Update Points Labels
- Configure the Leaderboard & Determine Release Time
- Update the Cumulative Leaderboard Status
- Update the Game Leaderboard Status
- Configure the Game Results
Name the Campaign
Name the newly created campaign by clicking on the Campaign Name field.
Login Modals and Pages
Email is the identifier used in the campaign and cannot be switched off because an identifier is required to sign up.
Guest User is a feature that provides user with a quick option to enter the game.
- When enabled, end-users have option to interact as a guest, allowing them to bypass the sign-up modal and begin answering questions.
- Guests will see their name as “Guest” and are able to click their profile icon to open the Profile modal, which includes an option to sign-up
- If a user choose to sign up after interacting as a guest user, their account will be updated and all the guest user’s participation and points will remain
- If a user signs out from their guest user account and then returns to sign in as guest on the same device within the same browser, their profile will remain (if a user user clears cache and/or access from a different device/browser, this will be a new guest user account)
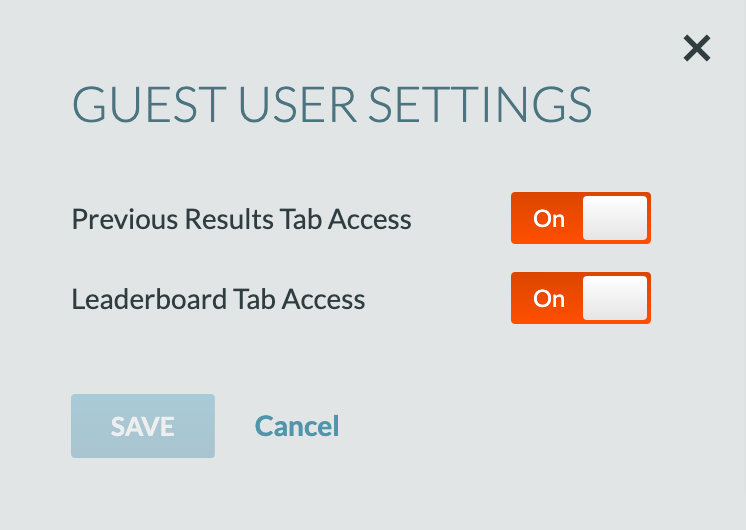
- Guest User Settings defines what a guest user can access without having to sign-up.
- When settings are toggled to “on,” guest users are able to access the Previous Results Tab and Leaderboard Tab without signing up
- When settings are toggled to “off,” guest users will be served the sign-up modal upon clicking the tab
The Login includes the sign-in page, sign-up modal & form, and the profile modal that is viewable once a user is logged in. To edit these pages, click the pencil icon next to Login. To learn more about editing these pages, go to Configure Login Page and Modals.
Note: These views are required and must be configured in your campaign.
404 Error Page
If there is no snapshot active for your campaign, the URL will show a 404 Error Page. You can make the 404 Error Page for each campaign unique by adding an image or video, writing a special message, and/or adding up to three text links. You can access the 404 Error Editor Page by clicking the pencil icon.
Geo Restrictions Page
This is where the geo restrictions can be set for the campaign. You can choose to include or exclude specific countries. If the geo limits are on, (countries have been added to the form field), the edit icon will allow you to style the Out of Geo page.
To style the Out of Geo page, click the pencil icon next to “Out of Geo.” Actions on this page include: adding a header, adding a sponsor image and graphics, adding a photo or video, customizing the Out of Geo message, and adding footer text and text links.
Page Info
In the Page Info section you can upload a Favicon (Favicon must be a PNG file – 32x32px) and update the Page Tab Title. The Page Tab Title for the web page is displayed at the top of the browser next to the favicon.

Social Sharing Content
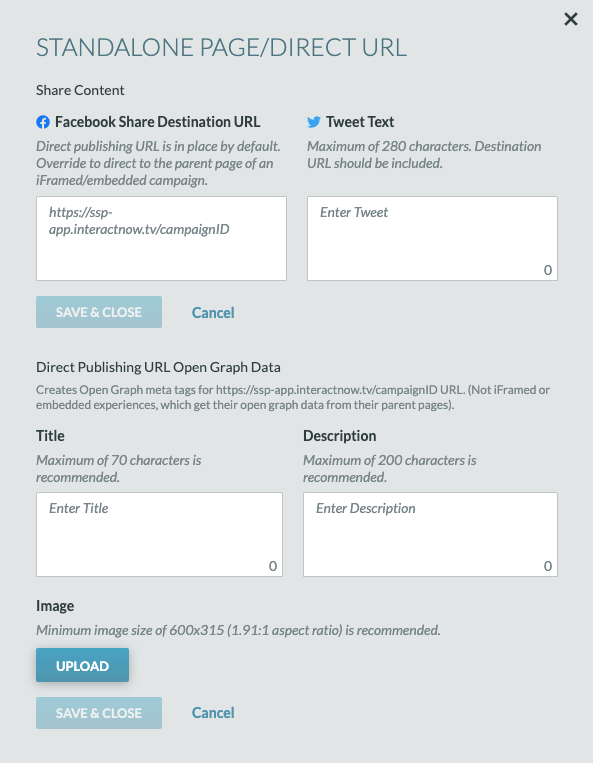
This is where the sharing info for the campaign is set, using open graph tags on the page. Click “Edit Content” to add the FB Share Destination URL (CM autogenerates the CM URL), a generic tweet, as well as a title, description, and image to the metadata.
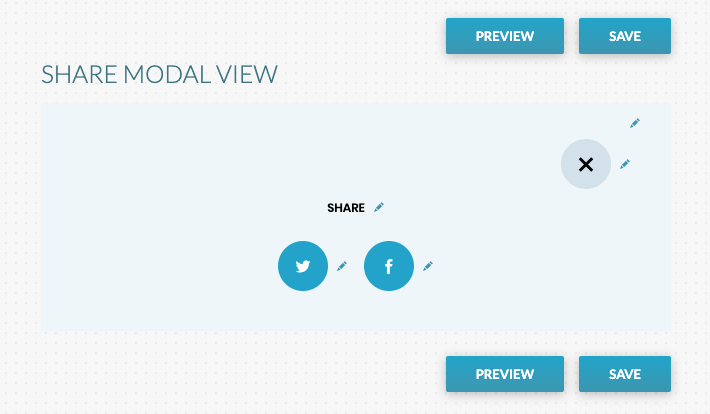
Click the pencil icon next to “Social Sharing Content” on the Campaign Settings tab, to edit the Share Modal’s title and logo colors. This modal will appear when users click the share icon when logged into the campaign.
Official Rules
For the Official Rules, a URL can be entered, a PDF can be uploaded, or text can be entered in the editor. If uploading or using the editor, a URL will be generated to access the information.
Important Note: If uploading a PDF or using the editor, each time a PDF is uploaded or a change is made to the editor, a NEW URL link will be generated.
Terms & Conditions
For the Terms and Conditions, a URL can be entered, a PDF can be uploaded, or text can be entered in the editor. If uploading or using the editor, a URL will be generated to access the information.
Google Analytics
To track your campaign analytics, create a Google Analytics ID and enter the ID into the provided field.
Update Points Labels
In the “points” label’s section, set the singular and plural labels for points as well as the abbreviations. In this section you can be creative and call points by another name (i.e. trophies or cookies) or update in the case of a language change.
Leaderboard

The pencil icon next to “Leaderboard” allows you to style the leaderboard view for both the Game Leaderboard and Cumulative Leaderboard. To learn more about editing these pages, go to Configure Leaderboard Pages.
Auto Release: This setting controls whether or not the scores and leaderboard will update automatically once the predictor game is scored.
- If auto-release is set to “off,” you have the option to review the names on the leaderboard before releasing scores and the leaderboard, and release the board manually from the Analytics tab at a later time. Go to Manage Leaderboard for more information on how to release the leaderboard manually.
- If auto-release is set to “on,” the scores and leaderboard will automatically be released once a game has been scored by clicking “Score Now”You can then review the leaderboard and make changes after it’s been pushed live
Player Info Displayed:
- Primary allows you to control the primary information you show for users who place on the leaderboard. Options include different variations of displaying users’ name and screen name.
- Note: If you change the user information that you display on the leaderboard, each game will need to be rescored to see the change on all games
- Secondary allows you to show a secondary piece of information about your users under their name. This secondary piece of info must be collected in the signup process to be displayed. (i.e. What is a user’s home state or favorite team? Jane S. from Oklahoma). Please see Login – Sign Up Modal & Form for where this information needs to be added.
- The trophy icon will take you to view the leaderboard in the analytics tab
Note: Leaderboard settings will not take effect until the next score or release. Changes to display info can be manually released without making a new score.
Changes to display info are not automatically released. They can always be released manually or they will update once the next score is made.
Cumulative Leaderboard
Displaying the Cumulative Leaderboard is optional and can be turned off and on. The Cumulative Leaderboard can display up to 100 players.
Game Leaderboard
Displaying the current Game Leaderboard is optional and can be turned off and on. The Game Leaderboard can display up to 100 players. You can choose to also show the Game Leaderboard for the previous game (if applicable) by leaving “Display Previous Game Leaderboard,” “on.”
Game Results
The pencil icon next to “Game Results” allows you to style the currently live and previous game results view. This is what users will see when questions are scored for the current game. To learn more about editing this page, go to Configure Game Results Page.